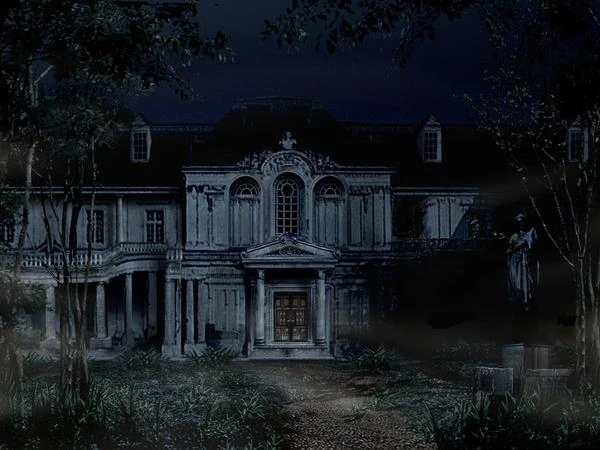
The Spencer Mansion is the primary setting of the first Resident Evil game and stood amidst Raccoon Forest in the mid-western American region known as the Arklay Mountains. This foreboding structure was built for Oswell E. Spencer - founder of the Umbrella Corporation - by the architect George Trevor, supposedly as a retreat for the company president and other high-level Umbrella staff. In actuality, the mansion served as a cover to hide Umbrella's secret genetic laboratory located beneath the foundations. The mansion's construction was completed in 1968 and Spencer invited George Trevor and his family to stay there, though he had no intention of letting them leave. Spencer himself spent very little time at the estate due to his duties of managing Umbrella from its European head office and was content to leave the mansion's upkeep to its appointed staff.
The Spencer Mansion is comprised of three major areas. The first is the main mansion itself, the second is a dormitory building that can be accessed via the mansion courtyard, and finally there is the Arklay Laboratory, the underground research facility located beneath the mansion's foundations.
History
For almost 30 years, the Arklay Laboratory would serve as Umbrella's primary genetic and viral research facility. It was here that researchers William Birkin and Albert Wesker would conduct highly sensitive research into the Progenitor virus and its off-shoot, the Tyrant virus. This was also the place where Umbrella developed its first successful B.O.W.'s, including the prototypes for their popular Hunter and Tyrant series. In the late 1980's, Birkin would leave the Arklay lab and conduct his G-virus research at the Raccoon City Underground Laboratory. Wesker would also leave in 1991, taking up a career with the Raccoon police force as a secret Umbrella investigator.
In 1998, the Arklay Laboratory fell victim to the machinations of Dr. James Marcus, apparently resurrected following his assassination ten years previously. Marcus had contaminated the facility's water supply with the T-virus, allowing it to spread rapidly among the staff, turning them all into zombies. As the lab staff succumbed to the virus, security procedures failed and various bio-weapon specimens were released into the surrounding wilderness. Weeks following the initial contamination, a number of brutal murders took place in Raccoon City. Due to the nature of the killings, the police department suspected the murders to have been perpetrated by some kind of cannibalistic cult. The Special Tactics and Rescue Service (S.T.A.R.S.) was mobilised to investigate the murders, but shortly after Bravo Team was sent into Raccoon Forest, contact was lost. The Alpha Team was sent in 24 hours later to continue the investigation and find Bravo Team, which led to them finding the Spencer Mansion and the horrific monstrosities that lurked within.
The entire investigation had been sabotaged from the beginning by Albert Wesker, the S.T.A.R.S. captain, who was under orders from Umbrella to gather combat data on the bio-weapons running loose in the Arklay facility by pitting the S.T.A.R.S. members against them. Once all necessary materials and documents had been secured, Wesker was to activate the lab's self-destruct mechanism and destroy it completely, removing all evidence of Umbrella's illegal activities.
As the S.T.A.R.S. continued their mission, they discovered the laboratory hidden beneath the mansion and uncovered Wesker's involvement with Umbrella. After fighting their way through Wesker and the monsters within the lab, the S.T.A.R.S. made their escape before the facility self-destructed, destroying all the remaining creatures and the source of the T-virus... Or so they believed.
Areas of interest
The design of the Spencer Mansion is truly twisted. The house is filled not only with monsters but with numerous traps and puzzles. Even with the secret of the Arklay Laboratory to protect, some of these puzzles are so convoluted that one has to wonder how the staff could carry out their work efficiently with so many security measures getting in the way.
Main Mansion
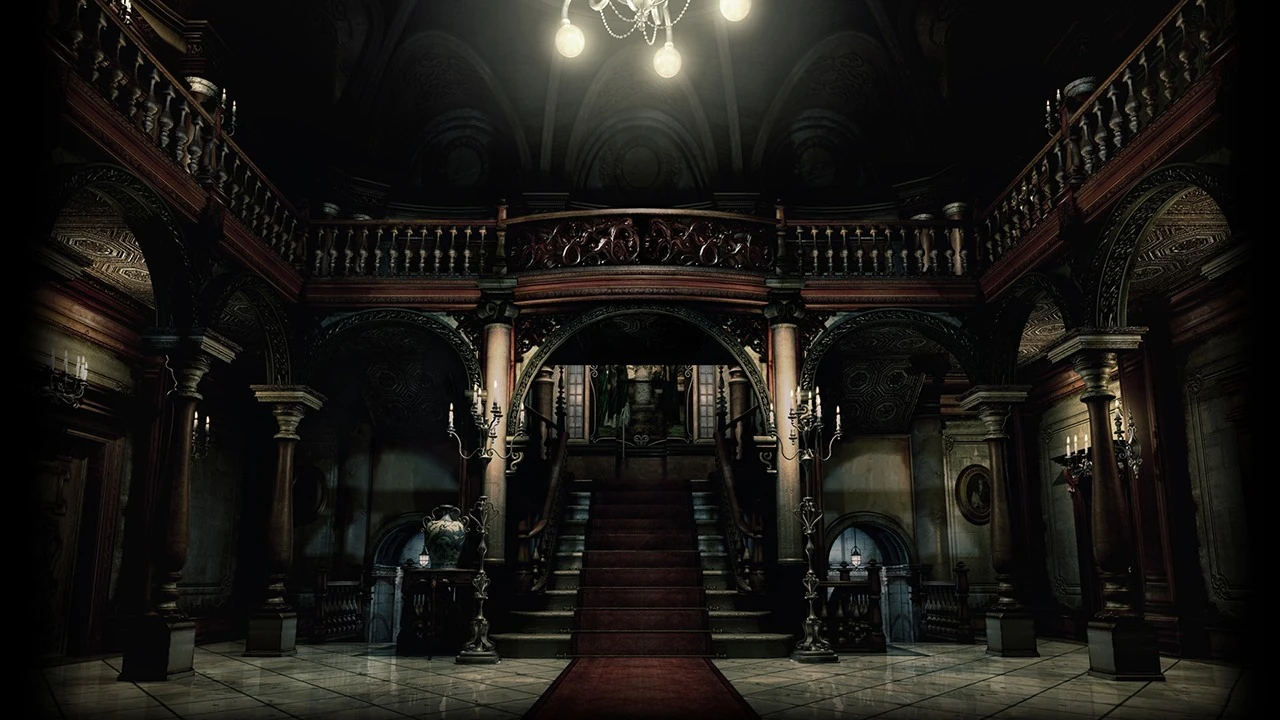
Spencer Mansion GF - Main Hall
Ground Floor
- Main Hall - Accessed via the house's front door. Generally regarded as a safe room during the S.T.A.R.S. investigation as their members split up and occasionally reconvened in this hall. At some point, the S.T.A.R.S. attempted to exit the front door only for zombie dogs to burst in. Beyond that, no other creatures were seen in this room.
- Dining Room - An immaculate dining room with a long dinner table, a grandfather clock on the north wall (actually a puzzle that contained a key), and a fireplace on the west wall with a Gold Emblem mounted above it (another puzzle that needed completing in order to open the clock containing the Shield Key). This room could be accessed from the door on the west side of the Main Hall and a door on the north side opened up into a corridor. When the S.T.A.R.S. began their search of the mansion, they entered this room to find a puddle of blood near the fireplace.
- Tea Room - A small lounge on the west end of the corridor after opening the northern door of the dining room. It is here that the S.T.A.R.S. Alpha Team encountered their first zombie, which they found eating their comrade from Bravo Team, Kenneth Sullivan.
- Graveyard - Located behind a door on the north side of the Main Hall. A few zombies were lurking in this area. Adjacent to the graveyard was a crypt that required a Golden Arrow to be fitted to an angel statue to unlock it. Within the crypt were a series of carved stone faces that could be fitted with ornate masks that unlocked another puzzle and a deadly threat: a coffin suspended by chains high above the floor. After the death masks were put in their proper places, the coffin fell to the floor and a set of bars blocked off the exit. The coffin opened to reveal a Crimson Head inside, which attacked Chris Redfield. Though the creature was stronger than the other Crimson Heads seen in the mansion, Chris was still able to kill it, and for his trouble he was awarded the Book of Curse (which contained the Sword Key) and a stone and metal object that granted access to the courtyard. A switch inside the coffin released the bars blocking the crypt's exit.
- Art Gallery - Accessed from the double doors on the east side of the Main Hall. Numerous paintings hung on the walls and a statue of a woman drawing water stood in the centre of the room. Inside the statue's urn was a map of the ground floor. An alcove in the northwest corner displayed more paintings and a costume wardrobe that could only be opened with a special key. A zombie was also lurking in the alcove.
- Bathroom - Located in the northeast wing. Jill Valentine acquired a desk key inside the bathtub which was filled with filthy water. Apparently an infected resident seemed to have drowned in the tub but was still alive and attacked Jill when she pulled the plug. After the zombie collapsed to the floor, Jill stomped on the creature's head and crushed its skull. She then had to throw up in the nearby toilet.
- Living Room - Also called the Smoking Room due to the stench of tobacco lingering in the air. A Remingtom M870 shotgun was mounted on the far wall and removing it activated a trap in the adjacent room.
- Trap Room - A perfectly square room with no distinguishing features other than a marble-tiled floor. Jill had to come through this room to enter the Smoking Room, but removing the shotgun from its wall-mount activated a trap in this room: the ceiling began to slowly descend. The doors on either side of the room locked themselves, leaving Jill with no way out. However, her compatriot Barry Burton heard her struggles from out in the corridor and shot out the lock with his magnum, pulling Jill to safety just as the ceiling came all the way down. The ceiling was a massive block of marble that completely sealed off the Smoking Room after coming down.
- Greenhouse - A fountain sat in the middle of this room that was surrounded by a set of mutated plant vines. On the far wall was a death mask needed to release the coffin in the crypt, but the vines would lash out at anyone who went near them. The S.T.A.R.S. were able to destroy the vines and retrieve the mask by introducing a herbicide to the fountain's water supply.
- Keeper's Bedroom - Inside this bedroom was a journal left behind by the mansion's caretaker. The document revealed how the T-virus had contaminated the underground lab and the caretaker also described his own declining health as he had been infected too. By the journal's last entry, the keeper had already degenerated to a zombie-like state as his writing had become more and more incoherent as his mental state deteriorated. The final entry revealed that he had gone insane and resorted to cannibalism. Apparently after finding the journal, Chris was attacked by a zombie that burst out of the closet. This zombie may very well have been the keeper.
- Infirmary - A small rest room under a flight of stairs. Inside was a cabinet filled with a number of pharmaceuticals, including a serum that was used to save Bravo Team member Richard Aiken after he had been poisoned by the Yawn.
First Floor
- Main Hall - Upper level.
- Dining Room - The balcony above the dining room encircles the whole room. Two doors on the north wall lead to separate corridors, both of which were crawling with zombies. Zombies also lurked on the balcony itself. A statue also rested on the balcony with a jewel set in it that could be used to solve another puzzle. A gap in the banister allowed the statue to be shoved off the balcony where it would smash on the dining room floor.
- Attic - A dark, dusty room in the west wing that was unlocked with the Shield Key. Inside the room was a death mask for the crypt. This is also where Alpha Team encountered the Yawn for the first time.
- Library - Located in the east wing, this room could only be reached after restoring power to the elevator. Here, the S.T.A.R.S. encountered Yawn for the second time and managed to kill the creature. In its death throes, the Yawn knocked over a large bookcase that contained another key.
- Armour Gallery - This room was one large puzzle. Inside were four suits of armour that needed to be put back in their proper places to open a small alcove containing a death mask. Putting the armours back incorrectly and trying to open the alcove would trigger a trap that released poison gas into the room.
Second Floor
The second floor consisted only of a corridor leading from the emergency elevator from the underground lab to the helipad on the roof.
Basement
In the mansion's basement was a kitchen. The kitchen had three points of entry: a stairway down from the west wing corridor on the ground floor, the service elevator that covered all the floors, and a door that lead out into the mansion's courtyard. The courtyard door had to be unlocked from the outside.
Dormitory
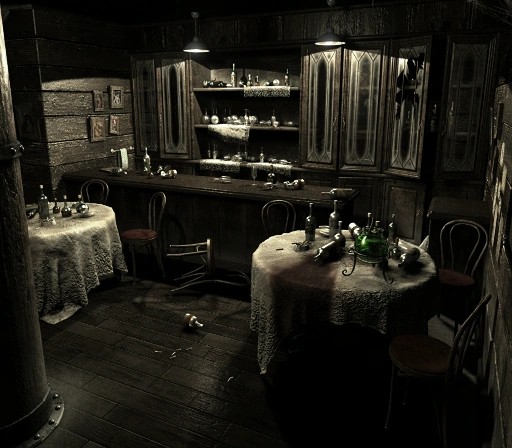
Dormitory Rec Room
This was a residential area for long-time research staff working within the Spencer Mansion. When the T-virus was scattered within the mansion and the laboratory beneath it, those who were sheltering in the dorm area were also infected. The Aqua Ring, a sub-section of the laboratory, could be accessed from a room in the residential area. The dormitory was destroyed along with the rest of the estate during the Mansion Incident.
- Recreation Room - This room contains a small bar along with a pool table and its walls were decorated with various pin-ups.
- Gallery - This spacious room contained a number of works of art. In an L-junction on the north side of the room is a giant wasp nest and the body of a researcher clutching a sprayer full of insecticide. Chris Redfield managed to brave the infected wasps in the room to grab the spray and use it to release the insecticide through a hole in the wall on the other side of the wasps' nest. With the nest destroyed and the wasps dead, Chris and Rebecca Chambers were able to obtain a key to Room 003 and could later access the storeroom.
- Storeroom - Within the Gallery was a small storeroom sealed with an electronic lock that required a passcode. After gaining access to this room, Chris and Rebecca were able to concoct a V-JOLT chemical capable of killing Plant 42.
- Room 001 - Living quarters where one of the mansion staff apparently committed suicide by hanging himself. As it turned out, this man had been infected and zombified and thus his suicide attempt was futile since he didn't shoot himself through the brain. Jill Valentine would see to that during the Mansion Incident.
- Point 42/Room 002 - The room that contained Plant 42.
- Aqua Ring - A subsection of the laboratory that could be accessed via one of the living quarters. This area was used for conducting T-virus experiments on marine life-forms, including great white sharks. A number of shark specimens designated "FI-3 Neptune" remained in the Aqua Ring following the outbreak but were killed after the S.T.A.R.S. members drained all the water from this section. The roots of Plant 42 also reached down to this section and absorbed water to sustain itself. Chris Redfield and Rebecca Chambers had the opportunity to poison Plant 42 by introducing a V-JOLT chemical to the water supply.
Laboratory

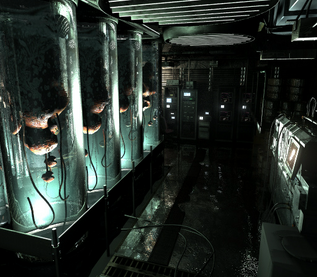
Arklay Laboratory - Embryo Chamber
The Arklay Laboratory was the first and most significant of Umbrella's genetic engineering facilities. Hidden from the outside world, Umbrella conducted all manner of gruesome experiments here in order to produce marketable biological weapons.
- Screening Room - A room containing a slide projector and screen. Here, the S.T.A.R.S. discovered several photographs of various B.O.W.'s as well as a photo of Wesker during his time among the research staff. Next to the screening room was a security booth containing video recording equipment. Jill used the equipment here to view Kenneth Sullivan's shoulder-cam video that had recorded the moment of his death.
- Dark Room - A darkened room for viewing x-rays of lab specimens.
- Operating Theatre - Here, Umbrella staff conducted surgical procedures on B.O.W. specimens.
- Holding Cell - A small prison cell that Wesker used to lock up one of the snooping S.T.A.R.S. members. This may also have been where Lisa Trevor was kept during her confinement.
- Power Room - Site of the Arklay Laboratory's main power generator.
- Embryo Chamber - Primary laboratory block where Umbrella scientists cultivated B.O.W. samples. The Tyrant T-002 was also contained here.
Creatures
Below is a list of creatures that populated the Spencer Mansion.
- Zombies - The Umbrella staff who worked in the mansion and lab were all infected with the T-virus and turned into undead husks that hungered for living flesh.
- MA-39 Cerberus - Doberman hounds injected with the T-virus deliberately to determine their potential as B.O.W.'s. While created in the laboratory, the dogs had escaped up to the Spencer Mansion above and into the surrounding forest by the time of the S.T.A.R.S. investigation.
- Crimson Heads - Any zombies that weren't decapitated or incinerated underwent a V-ACT mutation, becoming faster and stronger.
- Infected crows - These birds were typically found outside the mansion on the balconies, though one corridor sheltered a murder of crows perching on an electrified rail. Incorrectly solving the stained-glass portrait puzzle sent a current through the rail, urging the crows to attack.
- Yawn - A giant, mutant snake first encountered in the attic, then slain inside the library.
- MA-121 Hunter "α" - The first Hunter model was originally produced in the Arklay lab. During the Mansion Incident, most of the Hunters remained caged until Albert Wesker released them during the S.T.A.R.S. investigation. The majority of the Hunters had by then moved above ground into the mansion, though some dwelled within the catacombs.
- Chimera - These monsters remained confined to the laboratory area, hiding in the ventilation ducts and emerging to surprise the S.T.A.R.S. members as they explored the facility.
- Lisa Trevor - Umbrella's longest-surviving test subject. She had been forced to endure dozens of experiments with multiple viral strains which turned her into a near-indestructible monster. She escaped the lab level during the outbreak and roamed through the mansion's courtyard and catacombs.
- FI-3 Neptune - Located in the lab's Aqua Ring, these sharks were used as guinea pigs to test the T-virus' effects on aquatic life. The results were disappointing; the sharks only underwent minor mutations. All specimens were killed when the S.T.A.R.S. drained the water out of the Aqua Ring.
- Plant 42 - The roots of Plant 42 reached down into the Aqua Ring while the main body was located in the Arklay Dormitory. Chris Redfield and Rebecca Chambers were apparently able to introduce a V-Jolt chemical into the root that was able to kill off the plant.
- Tyrant T-002 - One of the original Tyrant models. This model had been rendered obsolete with the development of the T-103 in Europe and remained in suspended animation until it was activated by Wesker. The creature fought against the S.T.A.R.S. but was killed on the mansion's helipad when Chris blew it up with a rocket launcher.